Photography discussions online tend to focus almost exclusively on gear, but rather than posting more technical tests or reviews, I’d like to talk about working the scene – being on location, and making little decisions that make a photo better.
I like to go out and challenge myself – I pick a location, then pick a lens that seems entirely inappropriate for that environment, and try to find a way to make it work. In this case, I went to Mount Pleasant cemetery armed with a 14mm prime.
I don’t really show these photos or do anything with them, I mostly just review them, take notes, and hopefully learn something that I can use later on.
(Note: It’s 7am as of my writing this, and I have things to do this afternoon, so I’m going to declare this post a work in progress for now and go to bed. more details to come.)
My recent YouTube video comparing the nine year old Nikon D70 to the 9-months old full frame Nikon D600 has received a lot ofattention. And it has also received a lot of criticism for being a very sloppy, uncontrolled test. The intention of the last batch of tests was to show the differences you get when you just pick up the camera and go. The output was neutral profile Jpegs, no sharpening or noise reduction. Each of the cameras exposed the shots differently, rendered colours differently, and handled noise differently.
This second batch of tests was a lot more strict. Auto white balance was the only area where the camera got to think for itself.
I used manual exposure mode, and used the exact same settings between cameras.
I shot RAW, not JPEG, to ensure the cameras weren’t doing anything sneaky to the images.
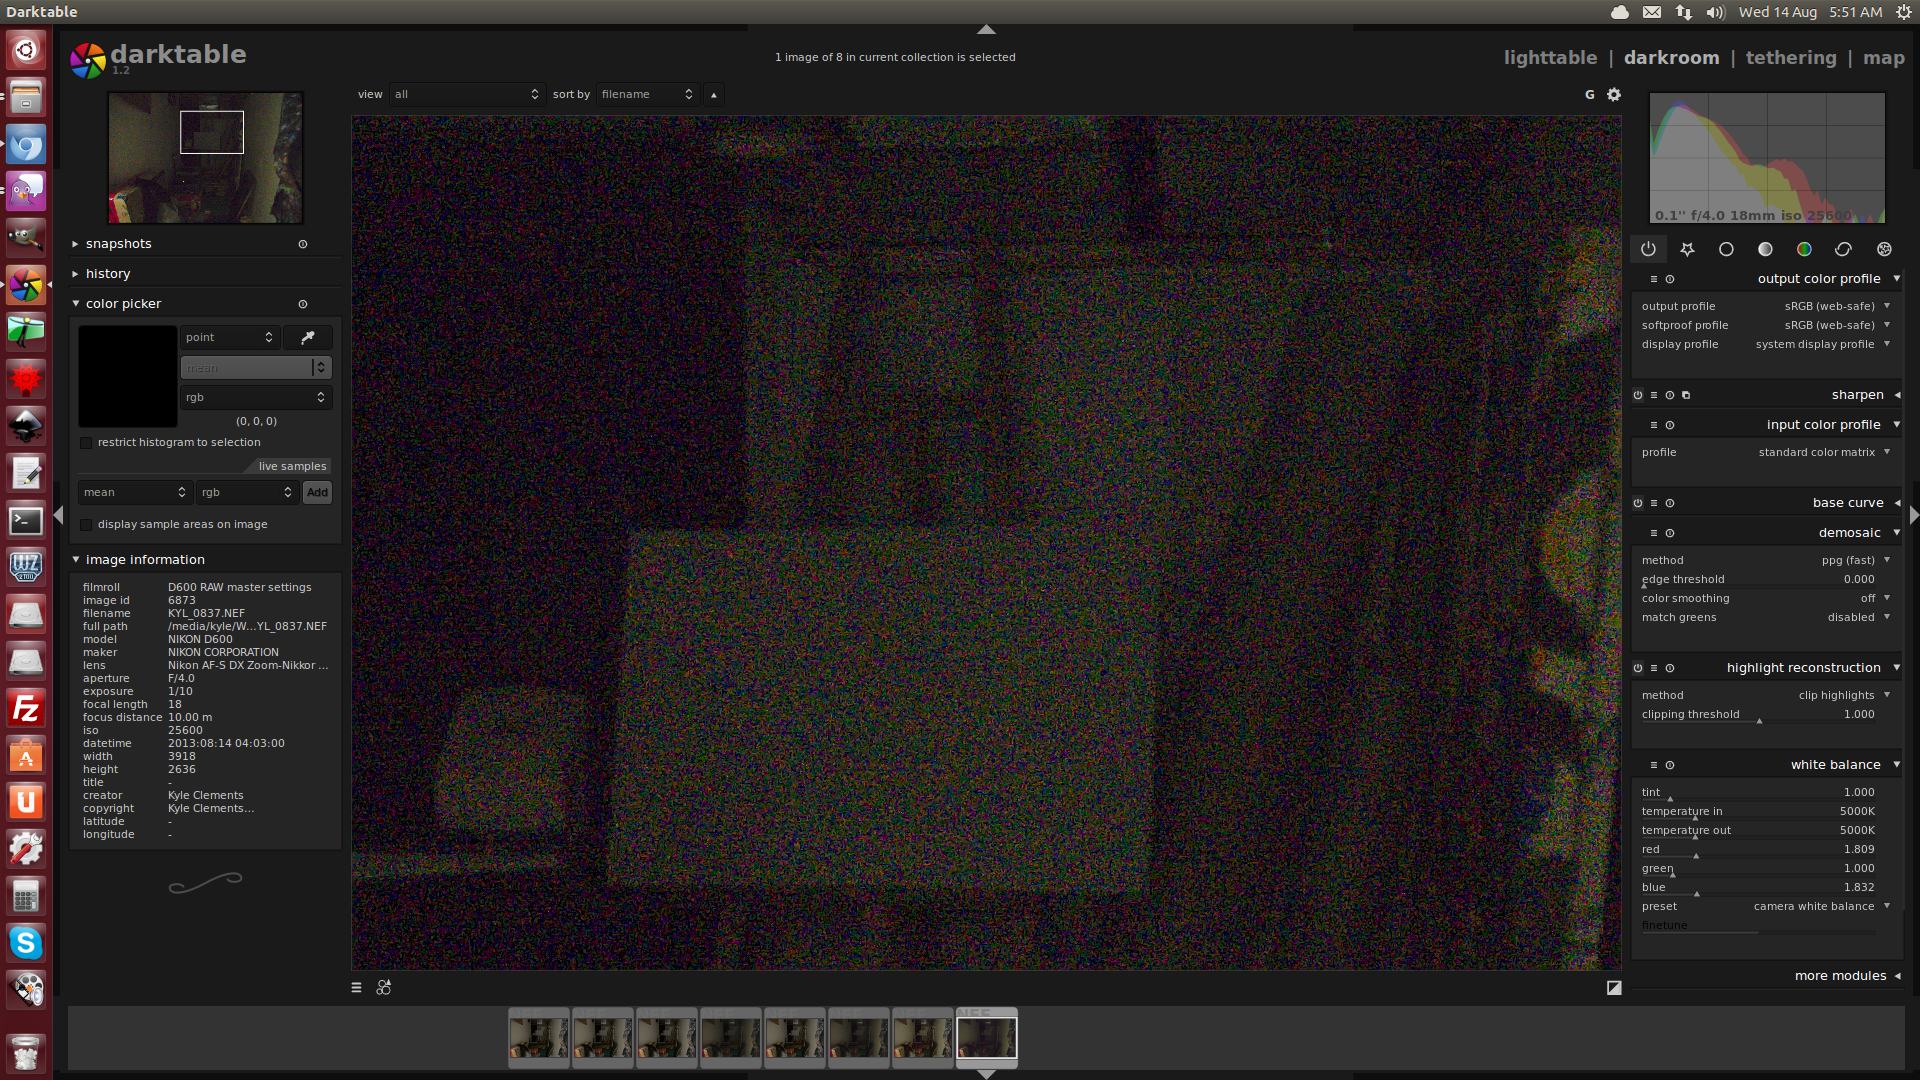
I took screenshots from inside Darktable, my RAW editor of choice, showing each of the images zoomed in to 100%, along with the camera settings.
The results were saved as PNG files, so there would be no softening as the images were compressed.
I’ll go from worst to best, starting with the D600. Click on the image to see the original, full size PNG screenshot.
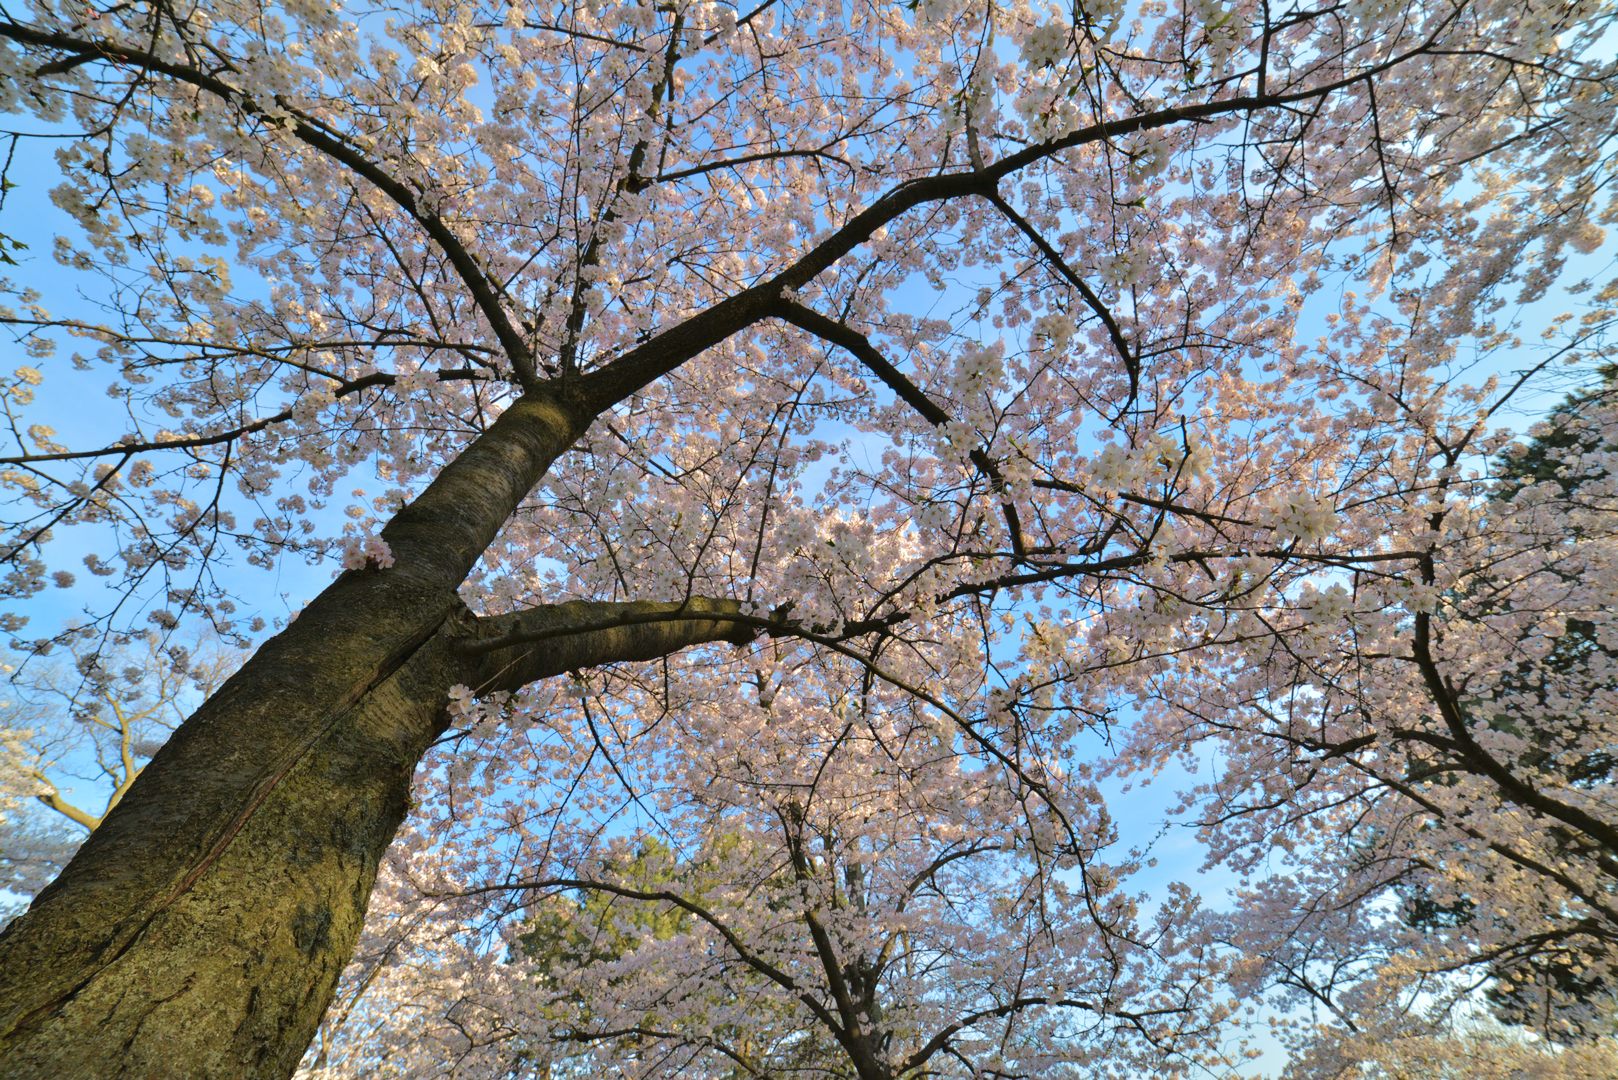
I’ve used my new Samyang 14mm f/2.8 for a lot of architectural shots, working on collecting new source material for a batch of new paintings that I will begin production on in the near future. But I can only photograph so many cubes before I long for rougher, rugged, irregular shapes. I wanted to take my new lens out into the wilderness and get some landscape shots!
Of course, there isn’t a whole lot of wilderness to be found in downtown Toronto, so I headed off towards the next best thing: High Park. The cherry blossoms were in full bloom this weekend. If you’ve never seen High Park’s famous Sakura trees in full bloom, then you are missing out.
(Warning: Extreme levels of photo-nerd talk below)
With the acquisition of my Nikon D600 several months ago, the world of ultra wide angle photography opened up to me. At first, I thought I could make due with my excellent Tokina 11-16mm f/2.8 DX wide angle lens. No – I’m not crazy, I really was using a DX lens on an FX body. The image circle projected by the 11-16mm when it is zoomed all the way out is large enough to cover a full frame sensor.
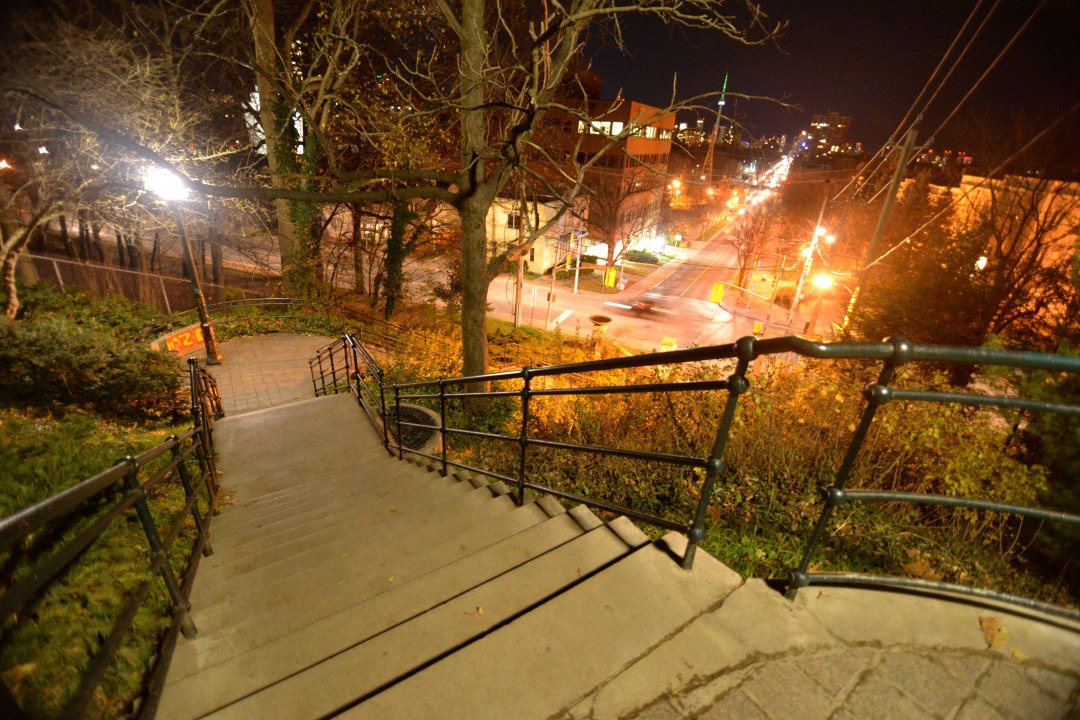
The Baldwin Steps, Toronto, ON. Image taken with a Nikon D600 and a Tokina 11-16mm f/2.8
The problem is that edge sharpness takes a nose dive, and the vignetting is terrible. And while the 11-16mm gave me beautiful images on my-6 megapixel D70, on a 24-megapixel D600, the limitations of this lens were apparent. It’s just not as sharp as I would want a lens to be. Since wide angle photography is something I enjoy, and I really want something sharp and wide. The old phrase “go big or go home” came to mind. Looks like it was time to buy a new lens.
After having the camera serviced by Nikon, my D600 is still suffering from an accumulation of dust, even after 5000 shutter releases.
The spots that are appearing now are a lot more faint, the accumulation of new spots has slowed, but it’s still happening. If I shot above F8 (which is 90% of the time) it’s not a problem at all, the spots are invisible, but if I stop it down any more than that, a few faint spots are visible on clear, bright flat areas.
I just realized I never posted part 3 of my D600 sensor dust test to my blog:
Part 3 of this video is another timelapse sequence combining 1000 photographs using the camera’s built-in intervalometer. The shots in this series range from #2681 to #3680, so I’ve broken that magic 3000 shots threshold that seems to be where things start to clear up for the D600.
In the comments to my previous videos, a number of people mentioned that the problem is oil/lubricant spatter, not dust (which explains why the spots will not blow away). And that this is a problem with new cameras, one that will go away after taking several thousand shots. So I figured, why not do a third sequence of 1000 shots and post the results?
Same setup as the first video:
I set up a time lapse sequence of 1000 shots with my 50mm 1.8D lens on my D600 body
I did not change lenses throughout this video.
I did use a hand pump blower to blast away any loose dust that had build up, and that did eliminate several spots, but the vast majority of them remain stuck to the sensor, and a DIY wet cleaning would void the warranty, which I am not prepared to do on a piece of equipment that is only one week old.
As you can see, while there is much less dust and oil landing on the sensor this time around, there are still a few new spots appearing. These look more like dust than oil spots.
I can deal with dust with a blower, it’s a minor annoyance, not a deal-breaker.
The camera was dropped off in person at a Nikon service centre on November 27th, and I am waiting for a call from them to let me know it’s time to pick it up. Then I will be able to see if the dust and oil problem has really worked itself out, if they have removed the excess lubrication, or if they’ve just spent two weeks doing a wet clean on my sensor.
Wow! What an incredible response to my first video. I wasn’t expecting any of this. Thank you to all for your comments and ideas.
As I was browsing the blogs who had picked up this story, and reading the viewer feedback, I was given several ideas that were too good to pass up. One was to try another set of 1000 shots, only this time, have the camera pointing downwards, so dust or oil will have a more difficult time reaching the sensor. So that’s just what I did!
Shutter Speed: 1/60
Aperture: F22
ISO 1600
Time between shots: 2 seconds.
Picked up a new toy; thought I’d do a boring technical review for you.
The Nikon D600 should be the perfect enthusiast camera with it’s fantastic specs, great low light performance, and an affordable price point for a full frame sensor. However, many reviewers and blogs have been raising concerns over a severe dust issue. Dust has reportedly been collecting on the upper left corner of the sensor at an unusually high rate.