(Warning: Extreme levels of photo-nerd talk below)
With the acquisition of my Nikon D600 several months ago, the world of ultra wide angle photography opened up to me. At first, I thought I could make due with my excellent Tokina 11-16mm f/2.8 DX wide angle lens. No – I’m not crazy, I really was using a DX lens on an FX body. The image circle projected by the 11-16mm when it is zoomed all the way out is large enough to cover a full frame sensor.
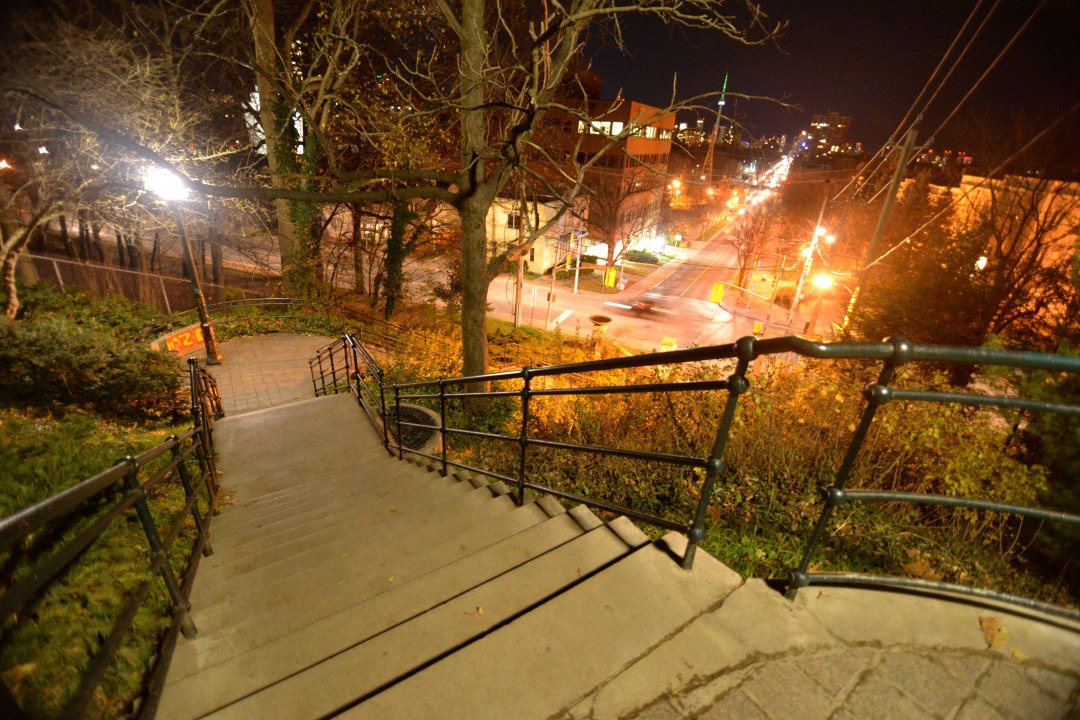 The Baldwin Steps, Toronto, ON. Image taken with a Nikon D600 and a Tokina 11-16mm f/2.8
The problem is that edge sharpness takes a nose dive, and the vignetting is terrible. And while the 11-16mm gave me beautiful images on my-6 megapixel D70, on a 24-megapixel D600, the limitations of this lens were apparent. It’s just not as sharp as I would want a lens to be. Since wide angle photography is something I enjoy, and I really want something sharp and wide. The old phrase “go big or go home” came to mind. Looks like it was time to buy a new lens.
Immediately, there were 3 options on my radar:
Tokina AT-X 16-28mm f2.8 Pro FX for Nikon
Nikon AF-S Zoom Nikkor 14-24mm f/2.8 G IF ED
Nikon AF-S Zoom Nikkor 14-24mm f/2.8 G IF ED
I don’t want to spend $2000, so right away, that knocks the 14-24mm off the list.
Tokina has kind of taken over the ultra wide angle lens department, pumping out a lot of really excellent stuff for really great prices. I’m cheap, I don’t like to spend money, so this lens really appealed to me. From the reviews I read online, it is supposed to be optically as good as the Nikon 14-24, for about a third the price. I was set to buy that lens.
But the Nikon 16-35mm had the option to attach filters, and being able to zoom out to the relativly normal angle of 35mm made this a very versatile lens. Being limited to f/4 isn’t that bad when you have VR, and the weather sealing and nano-coating had me leaning towards going with the Nikon lens. Name brand glass traditionally holds it’s value a lot better than lenses made by 3rd party manufacturers, so that was another point in Nikon’s favour.
The only thing I didn’t like about either of these two options was spending money to upgrade my image quality, but I wasn’t breaking new ground, opening up any more possibilities or wider angles, I was still going to be stuck at 16mm. I already had 16mm, I wanted more ultra wideness! I wanted that 14mm that I just couldn’t afford.
But then DXOmark posted their list of Best Wide Angle Lenses for a D800, and I was reminded of a little Korean lens company that makes optically excellent products for dirt cheap.
The Samyang 14mm f/2.8 IF ED UMC Aspherical.
A prime lens which, according to the reviews, featured better sharpness than the 14-24mm. It was crisp from centre to edge, amazing control over chromatic aberrations, and when stopped down to f/8, the vignetting was minimal.
Ok, damn. I think I found my lens. The only question left was “How much?” $429.99 CAD? Damn. Yes, I found my new lens!
It was a prime lens, and it wasn’t able to accept filters, and it wasn’t weather sealed, so I was losing a lot of versatility that the Nikon 16-35 f/4 would have given me, but it was sharper and wider for a third the price, and sharp and wide and cheap is exactly what I was after. It was a fully manual, nothing automatic, nothing electronic, no communications with the camera body, just glass metal and plastic kind of lens. Being a manual focus only lens might seem like a limitation, but at 14mm, hyperfocal distance is your friend.
Don’t trust the online hyperfocal calculators, they are all overly generous with determining the depth of field. They assume you will be printing a 35mm negative to 8″ X 10″. When you pixel-peep, that’s more like blowing an image up to 40″X 60″, at that scale, you need a much more strict rule for calculating hyperfocal distance. I worked out a simple rule that is far more strict, but I believe is much better at determining DoF for larger prints. (I also made it an alliteration, just for fun.) “For fourteen, five is five, then flip.”
Ok, that makes zero sense without an explanation (but neither does Sunny 16 and people are able to remember and use that…) What that means is that when shooting 14mm, the hyperfocal distance at f5.6 is 5.6 meters. If you change the aperture by one stop, change the focus distance one stop in the opposite direction.
So at f/8, set the focus to 4 meters away; at f/4, set the focus to 8 meters away.
At f/11, set the focus to 2.8 meters away; at f/2.8, set the focus to 11 meters away.
By following this rule, the area from 1/2 the focal distance to infinity should be in crisp focus. That’s what I mean by “For fourteen, five is five, then flip”.
I did a little more research, and quality control is a concern that was brought up fairly often with Samyang lenses. People wrote about ordering one, sending it back for an exchange, and only getting a great one on the 2nd or 3rd try. So rather than seek out the cheapest place online and deal with exchanges and returns, I’d like to buy it in person. Luckily for me, Toronto’s Downtown Camera carries Samyang products (they were the only place that did) I attached my 50mm 1.8D lens, stopped down to f/5.6 and used live view zoomed to 200% to get an idea for what a sharp lens looks like up close. Then I walked down to Downtown camera, D600 in hand, attached the Samyang lens, and had a look. The model I had was perfect. No issues whatsoever, it was perfectly sharp. It was actually better than perfect, as Downtown Camera was selling the chipped version of the lens! That meant I can use P, S, and A modes, and the exif data would include the lens, focal length, focus distance, info. I was not expecting that feature. A happy surprise to be sure.
When it comes to the Samyang 14mm f/2.8, the elephant in the room is the awful moustache distortion. It really is awful. I do a lot of architectural photography, and most people reviewing this lens were saying that it is a write-off for shooting anything with straight lines; don’t even bother shooting architecture. I don’t give up that easily! Correcting distortion in software isn’t that hard, you just have to go through the work of finding the right values to type into your lens correction software. (for example, in Gimp, using the “Lens Distortion” filter with “-40.32” “17.65” and “-7.9” for “Main”, “Edge”, and “Zoom” gives some pretty ok results)
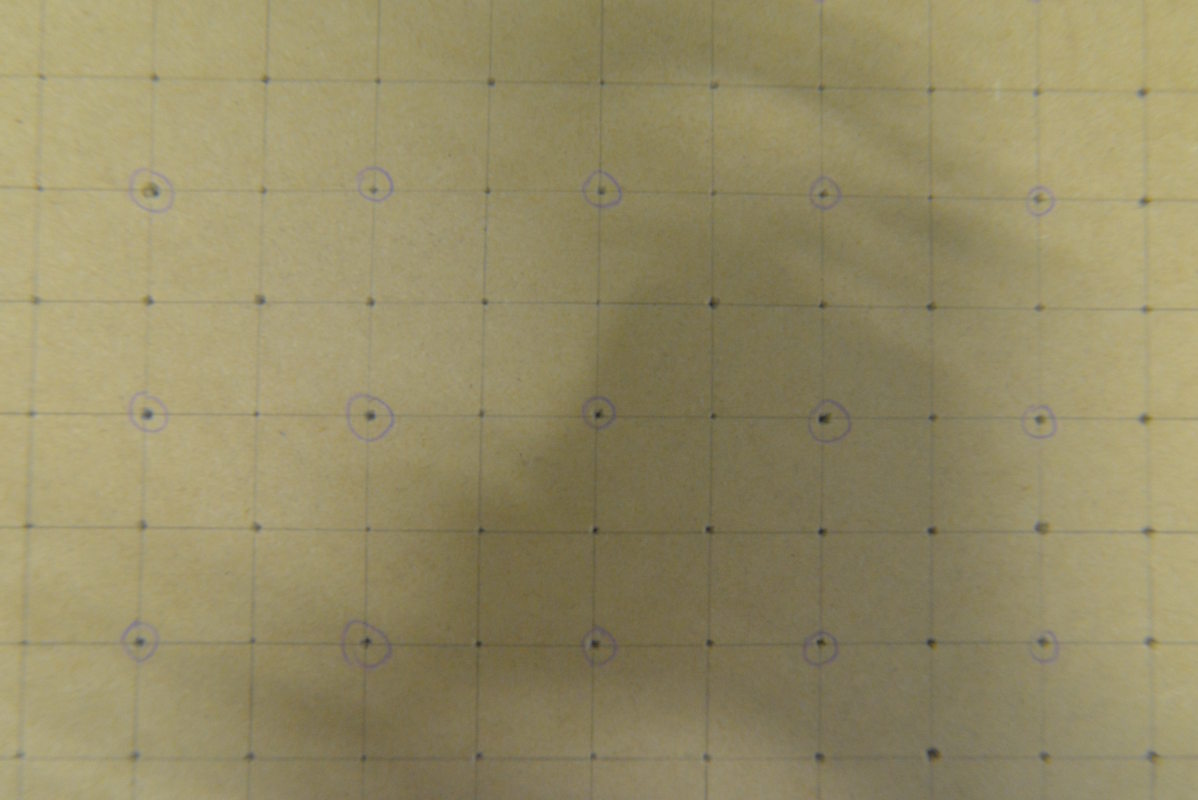
Straight from the camera:

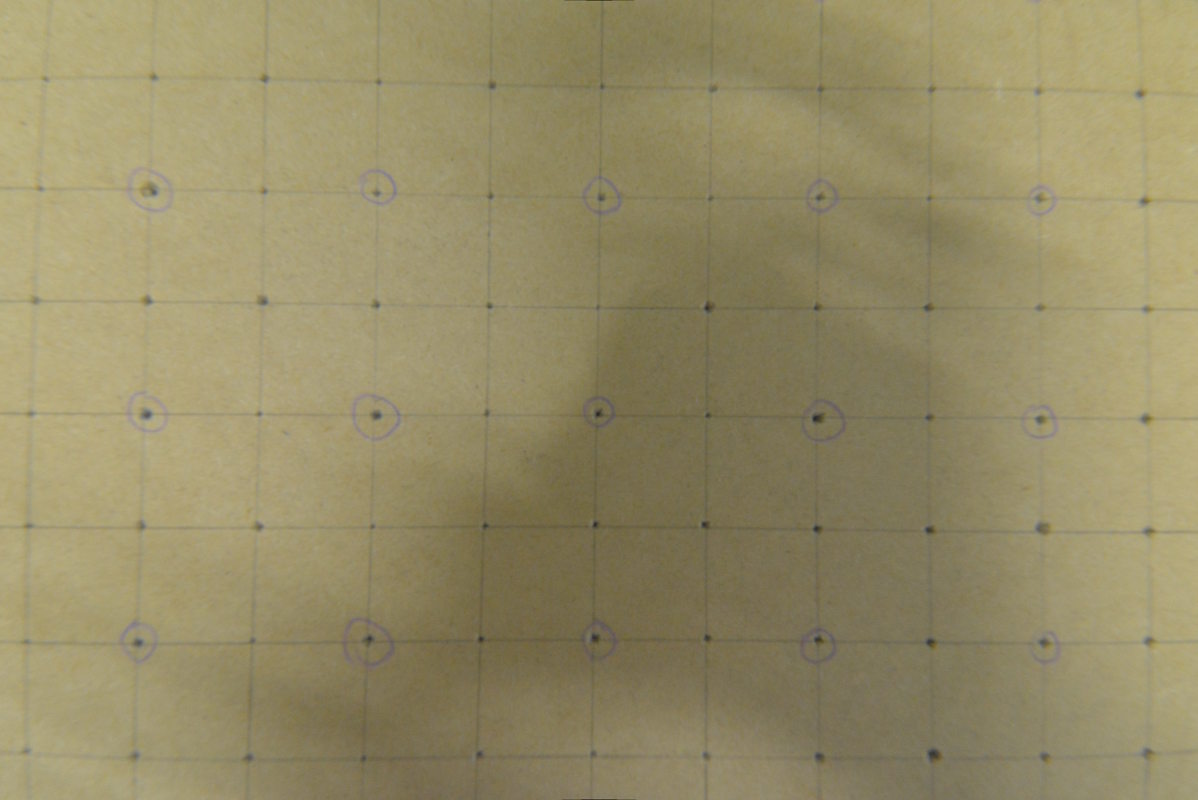
Corrected in GIMP using the values mentioned above:
But wouldn’t it be nice to have something where you could punch in these numbers once, and it would remember these values across all your image manipulation programs? Well, you’re in luck, the lensfun thing (program? plugin? library? database?) is now available in the Ubuntu repos, so installing this is now super easy!
Open up the terminal and enter “sudo apt-get install gimp-lensfun”
Ok, so now you may be wondering, “what did you just install on your system?”
Lensfun includes a list of cameras and lenses, and contains details about their quirks and imperfections so programs like Gimp or Darktable can quickly correct these issues. It’s a great little piece of software. There is only one little problem: the Samyang 14mm 2.8 isn’t in their database.
“So, why did you have me install this then?”
Relax, if they don’t include it, you’ll just have to add it yourself.
Type in “sudo nautilus” in the terminal to give you root privileges across the board.
Go to /usr/share/lensfun.
Now, create a new file called “slr-samyang.xml”
Open it up in a text editor (I used Gedit)
and enter the following:
<lensdatabase>
    <lens>
        <maker>Samyang</maker>
        <model>Samyang 14mm f/2.8 IF ED UMC Aspherical</model>
        <mount>Nikon F AI</mount>
	<mount>Canon EF</mount>
        <mount>Pentax KAF</mount>
        <cropfactor>1</cropfactor>
        <calibration>
            <distortion model="ptlens" focal="14" a="0.0337" b="-0.07698" c="-0.05842" />
        </calibration>
    </lens>

</lensdatabase>
Save the file, and this lens is now in your database. You can now use Lensfun with just about any of your image manipulation poorograms (Gimp has Lensfun in the “filters>enhance>lensfun” section)
Corrected using the custom Lensfun Samyang 14mm profile:
These values aren’t perfect, but they are pretty damned good I think, and the best way to get to the truth is to post something that’s wrong on the internet, and hoards of people will come in and correct you.
I’m waiting.
Great write up! Umm’ing and ahhh’ing about this lens! Would’ve been awesome to have a few photos of the lens in action? But the bits about fixing the distortion are perfect!
Thanks for the comment. I’m still thrilled with this lens months later.
I planned on making a YouTube review of this lens last month, but never got around to it. I should do that soon, and show some clips of the lens in action.
Nice write up, thanks. Ordered mine and waiting impatiently for it to arrive. My question is how you set for 4m Vs 5.6m Vs 8m hyperfocal distance when the scale on the lens jumps from 3m to infinity?
Hello. Thanks for the comment.
I find that on modern, high resolution sensors, older DoF calculations aren’t quite strict enough for people who like to enlarge things beyond 8″ X 10″, or just zoom in to 100% to check focus.
Also, While the optics on this lens are great, the focus scale can be off. Mine focuses well beyond infinity, and 3m is closer to 5m.
I installed gimplensfun after reading your article, thanks a lot!
The latest version of the lensfun library (0.2.8) contains a xml file for Samyang lenses, so I borrowed it. It looks more corrected, I prefer it for my kind of pictures. The file contains only a Canon EF mount, I added the Nikon one (I have a D700).
The calibration is:
It’s a very nice lens. I used it for shooting stars at full aperture. It shows some coma in the corners, but it’s acceptable.
Apart from the moustache, the main problem I had is that the focus sticks at -15°C/-20°C. The lubricant is not calibrated for the Canada climate! It’s a good idea to find the infinity setting at the beginning of the shooting session…
Regards
Patrice
Thank you, Patrice.
You are right, the new profiles that come with LensFun are much better than the numbers I cam up with.
I haven’t used the lens at night in the winter, so I appreciate the warning.
Sorry, the calibration did not show. Here is the code without the xml:
1st line, between an opening bracket and a slash + a closing bracket:
distortion model=”ptlens” focal=”14″ a=”0.04015″ b=”-0.07043″ c=”-0.05466″
2nd line, repeat the opening and closing marks:
tca model=”poly3″ focal=”14″ br=”0.0000198″ vr=”0.9999690″ bb=”-0.0001334″ vb=”1.0003226″
Thanks Kyle. Love your approach! Great review.
I just installed the Rokinon 14mm profile in Lightroom and well results are bit better than my own corrections. I will try Gimp to see this module compared to the one for LR.
I was thinking about turning back my Samyang before I read your review, so I am really thankful to you.
At the end of the day I guess that I need more practice to know how distorsion affects this lens, so I could avoid it and get more from this lens.
Thanks,
Jorge